
반응형
Notice
Recent Posts
Recent Comments
Link
| 일 | 월 | 화 | 수 | 목 | 금 | 토 |
|---|---|---|---|---|---|---|
| 1 | 2 | 3 | 4 | 5 | ||
| 6 | 7 | 8 | 9 | 10 | 11 | 12 |
| 13 | 14 | 15 | 16 | 17 | 18 | 19 |
| 20 | 21 | 22 | 23 | 24 | 25 | 26 |
| 27 | 28 | 29 | 30 |
Tags
- Expo
- Django
- react
- docker
- Nas
- 나스
- 리액트
- 장고
- ReactNaitve
- 캠핑
- 리엑트
- synology
- 가상환경
- 맛집
- 서울
- 함수
- Excel
- 강릉
- 캠핑장
- 엑셀
- MSSQL
- 시놀로지
- 연곡해변
- apk
- 수도권 근교
- 시놀로지나스
- SQL
- reactnative
- react native
- Firebase
Archives
- Today
- Total
차근차근 생활 & 코딩
[React Native] EXPO - Firebase 로그인, 로그아웃 본문
반응형
안녕하세요.
이번시간에는 리액트 엑스포 파이어베이스 로그인, 로그아웃에 대해 알아보도록 하겠습니다.
Part 1. 라이브러리 설치
- Expo Firebase를 사용하기 위한 라이브러리를 설치합니다.
expo install firebase @react-native-firebase/app @react-native-firebase/auth @react-native-firebase/firestore
Part 2 .Firebase 콘솔 설정

① 프로젝트 추가 버튼 클릭
② 본인이 원하는 프로젝트 이름을 기입하도록 합니다.
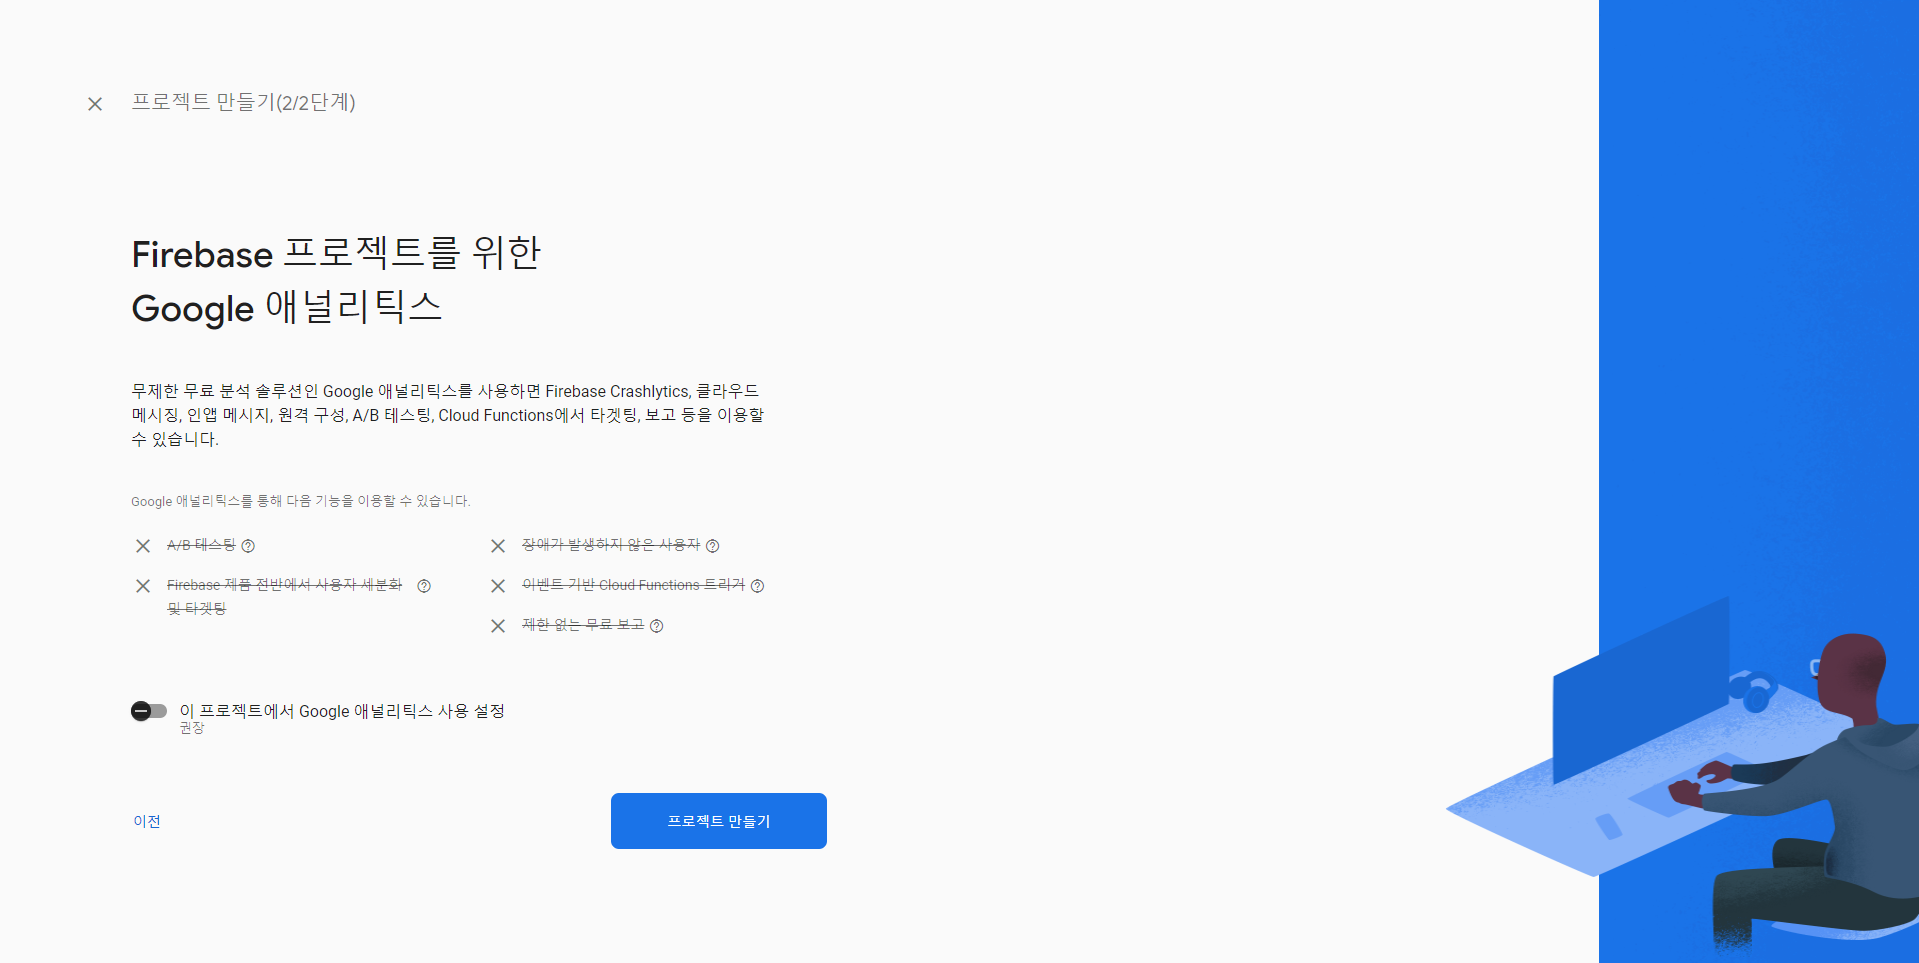
③ 프로젝트 만들기를 클릭하다록 합니다.
* 애널리틱스는 본인 선택사항입니다.

④ 새 프로젝트가 완료되면 계속 버튼을 눌러주도록 합니다.
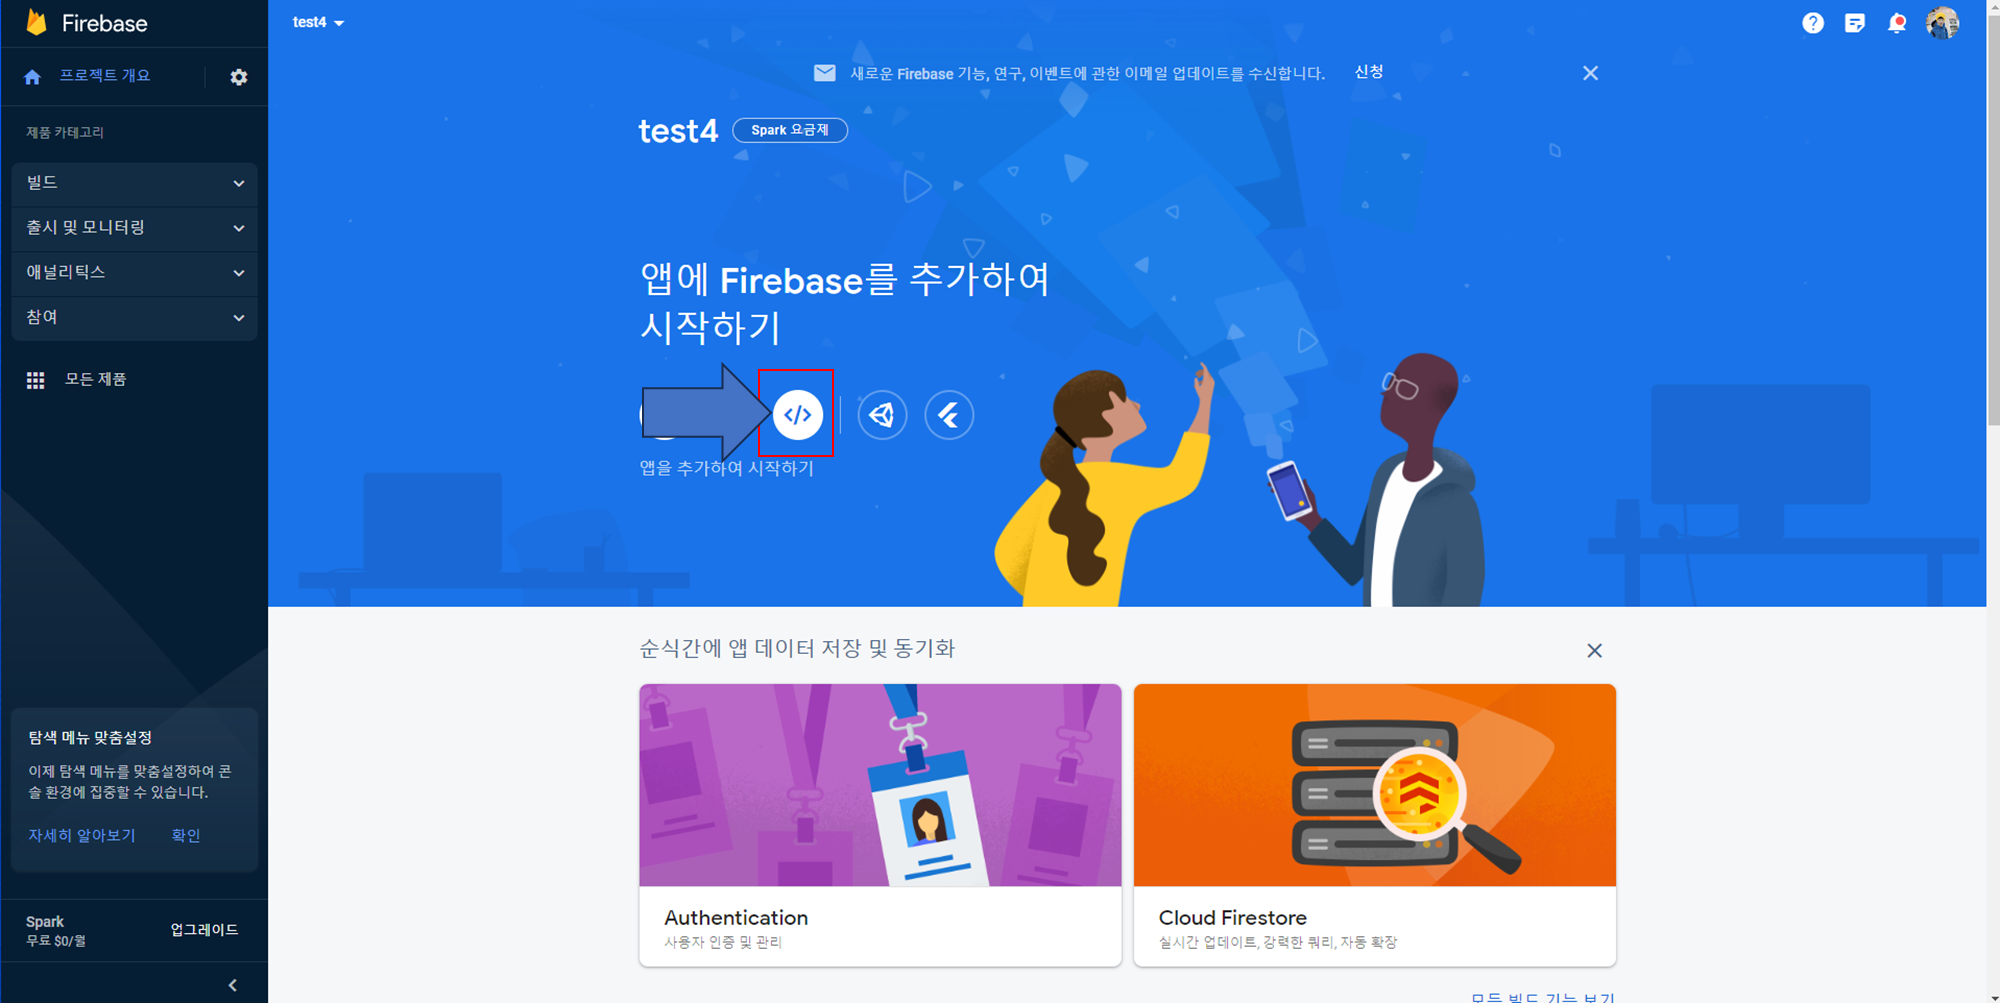
⑤ 웹 버튼을 클릭해 주도록 합니다.
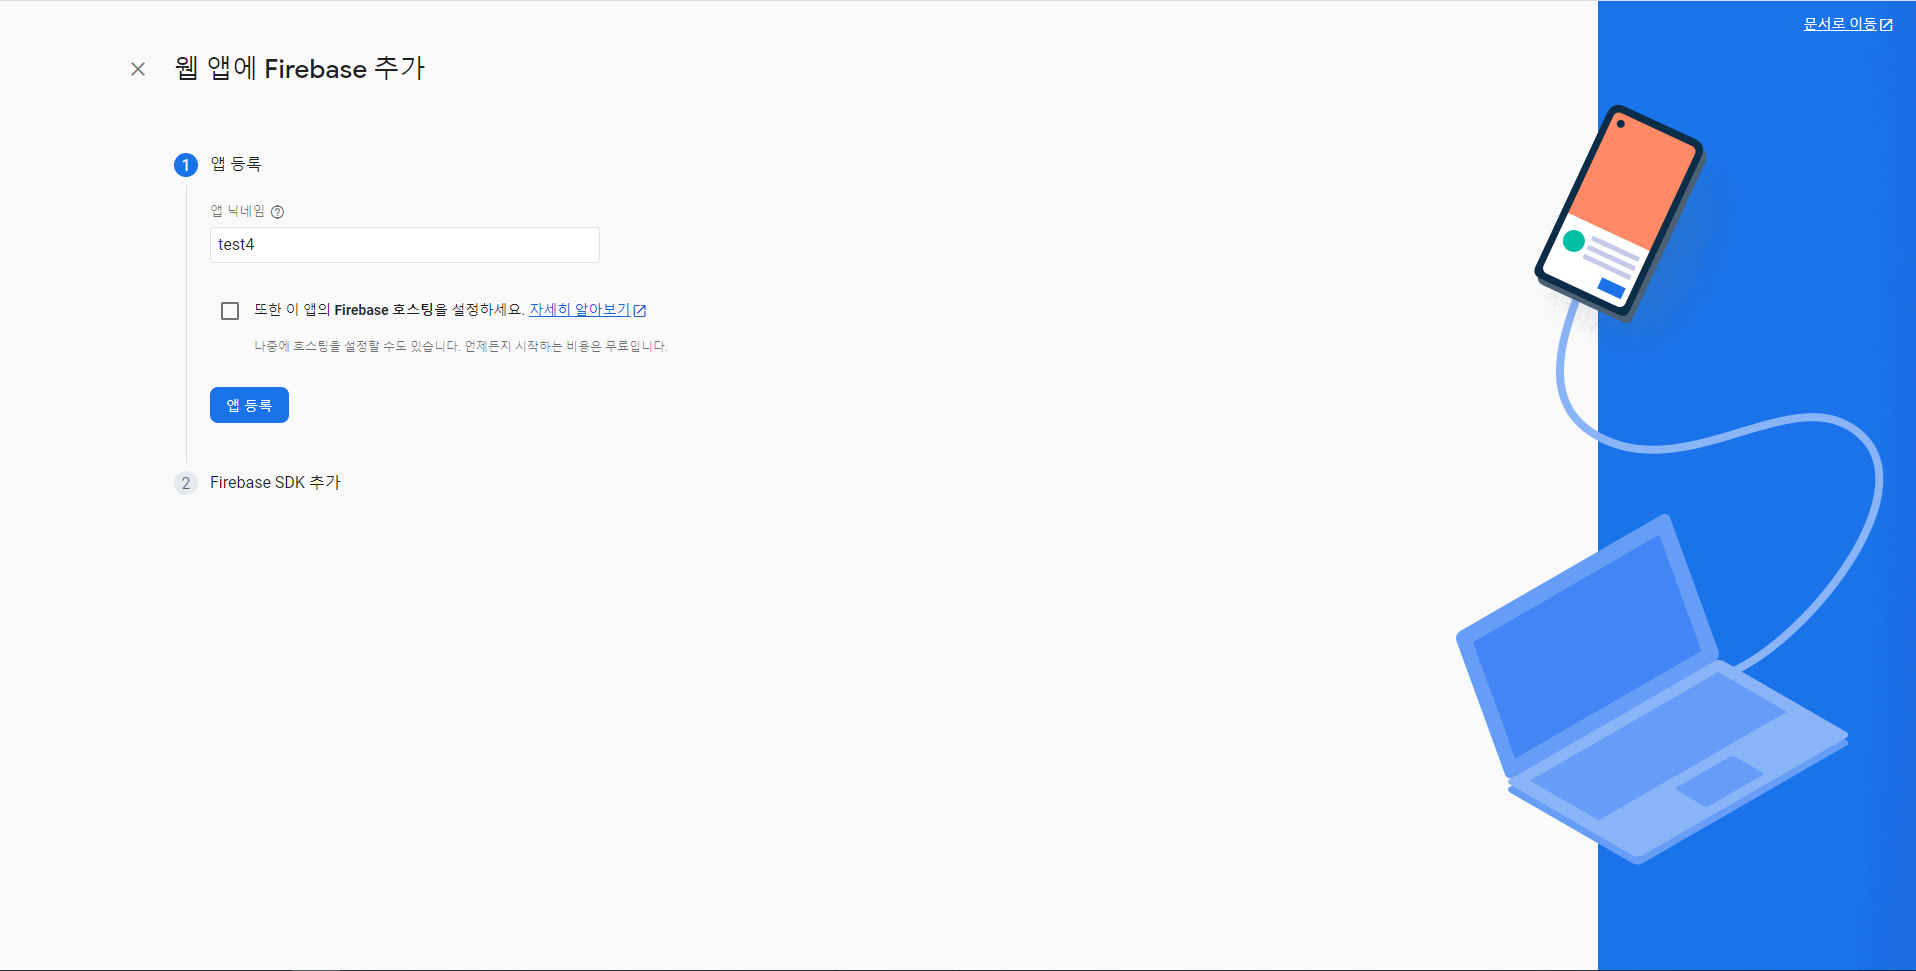
⑥ 앱 닉네임을 기입 후 앱 등록 버튼을 눌러주도록 합니다.
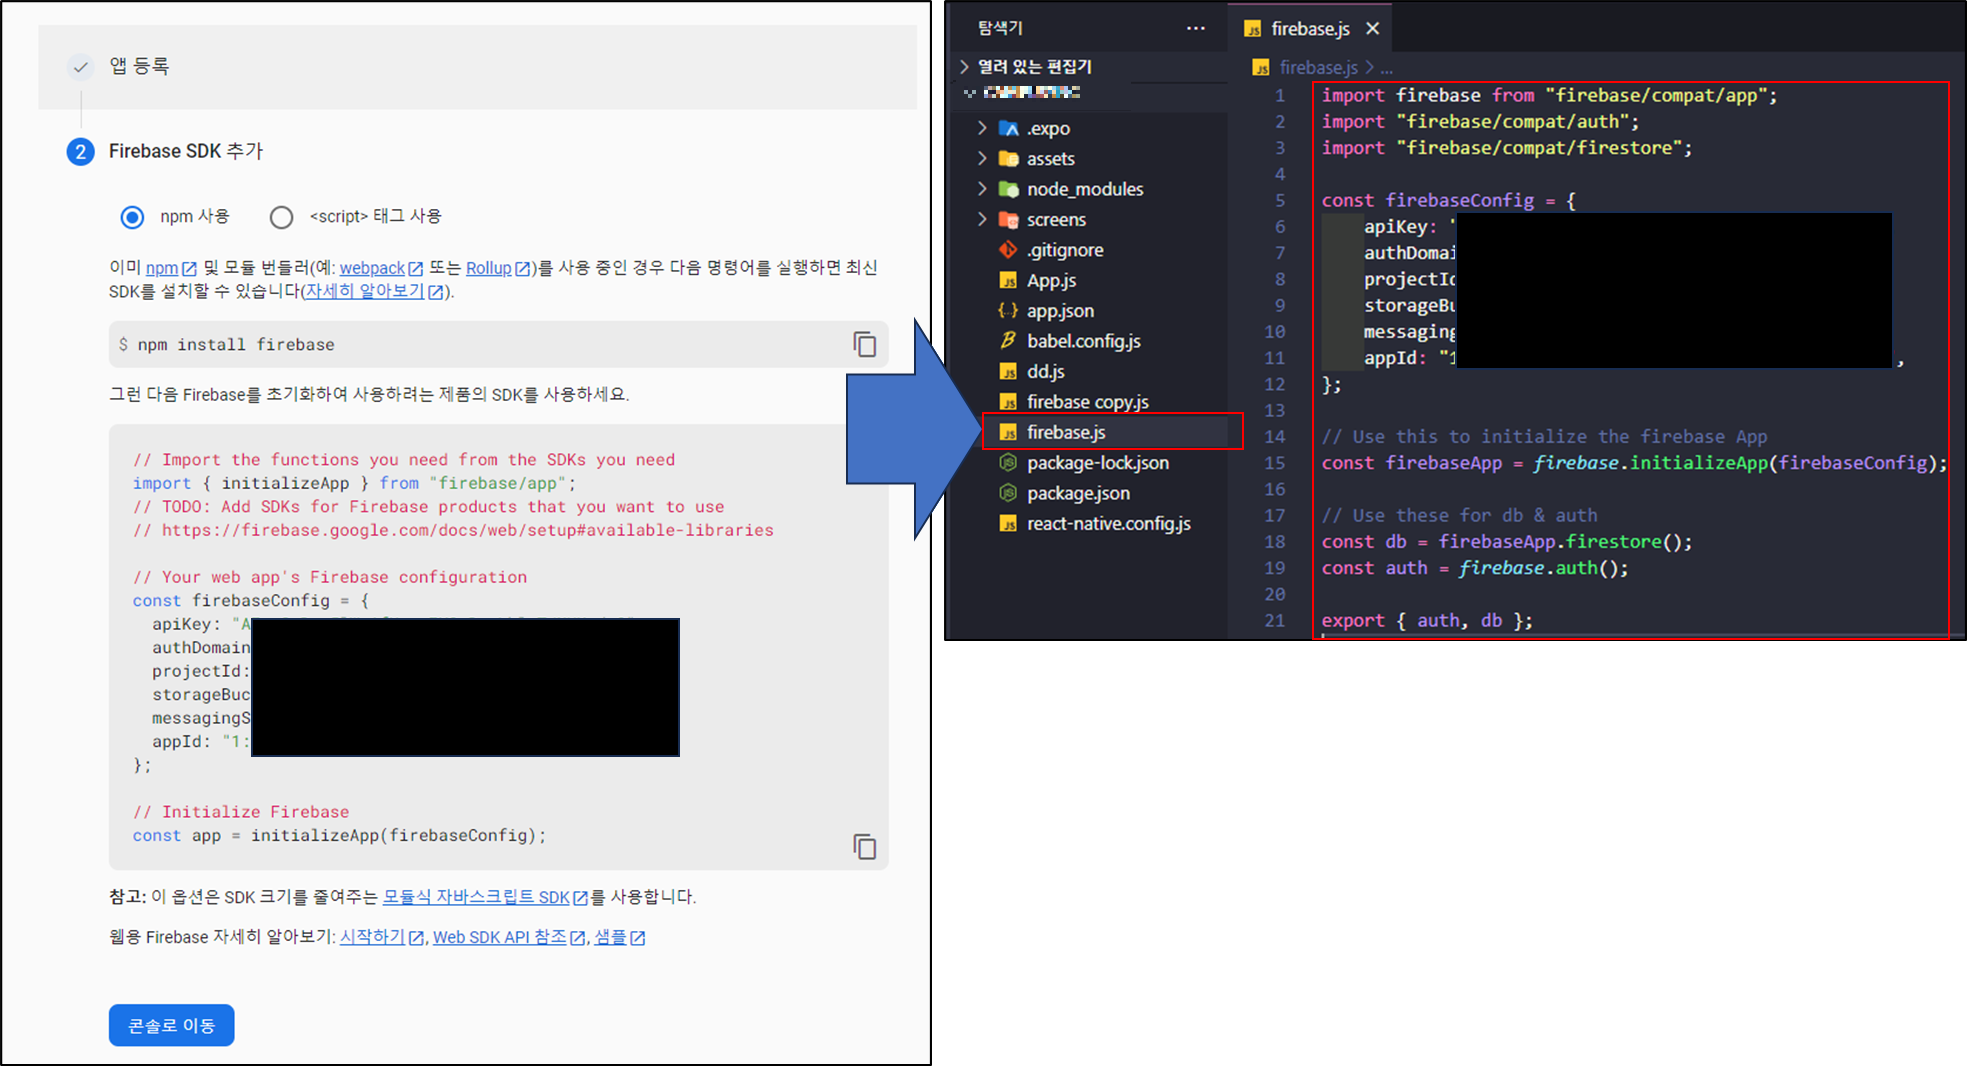
import firebase from "firebase/compat/app";
import "firebase/compat/auth";
import "firebase/compat/firestore";

const firebaseConfig = {
    apiKey: "AIsdfsdafsdafsdagsdag-2Vsdklfjjxsdalfkn",
    authDomain: "test4-588fe.firebaseapp.com",
    projectId: "test4-588fe",
    storageBucket: "test4-588fe.appspot.com",
    messagingSenderId: "29495481908",
    appId: "1:1298490854:web:dkdfjg490192090459890",
};

// Use this to initialize the firebase App
const firebaseApp = firebase.initializeApp(firebaseConfig);

// Use these for db & auth
const db = firebaseApp.firestore();
const auth = firebase.auth();

export { auth, db };
⑦ 본인 Expo 파일 안에 firebase.js 파일 생성 후 Firebase SKD를 추가 하도록 합니다.
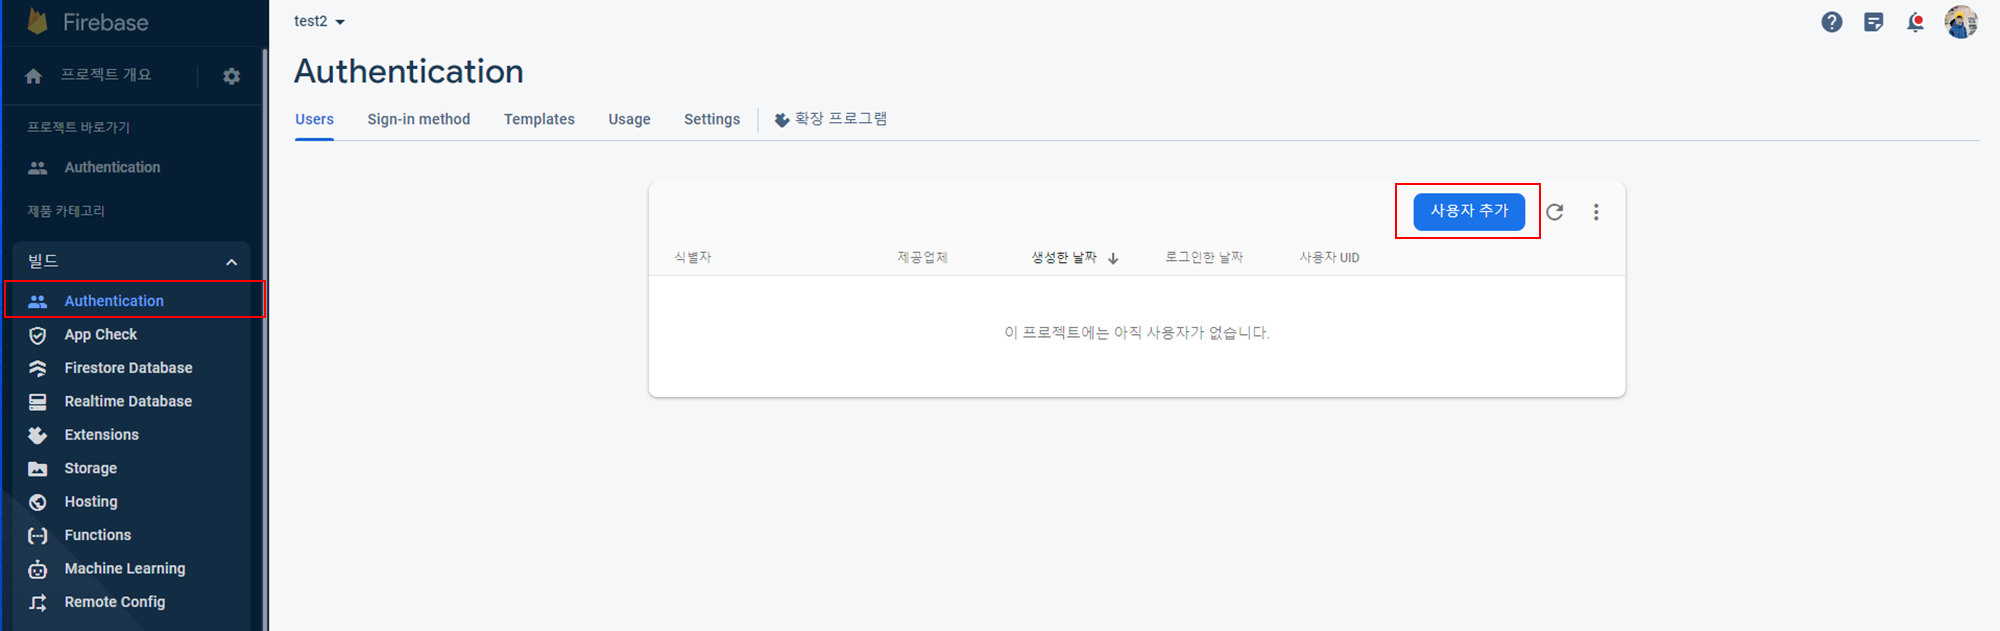
⑧ 빌드 > Authentication > 사용자추가 버튼을 클릭해 주도록 합니다.
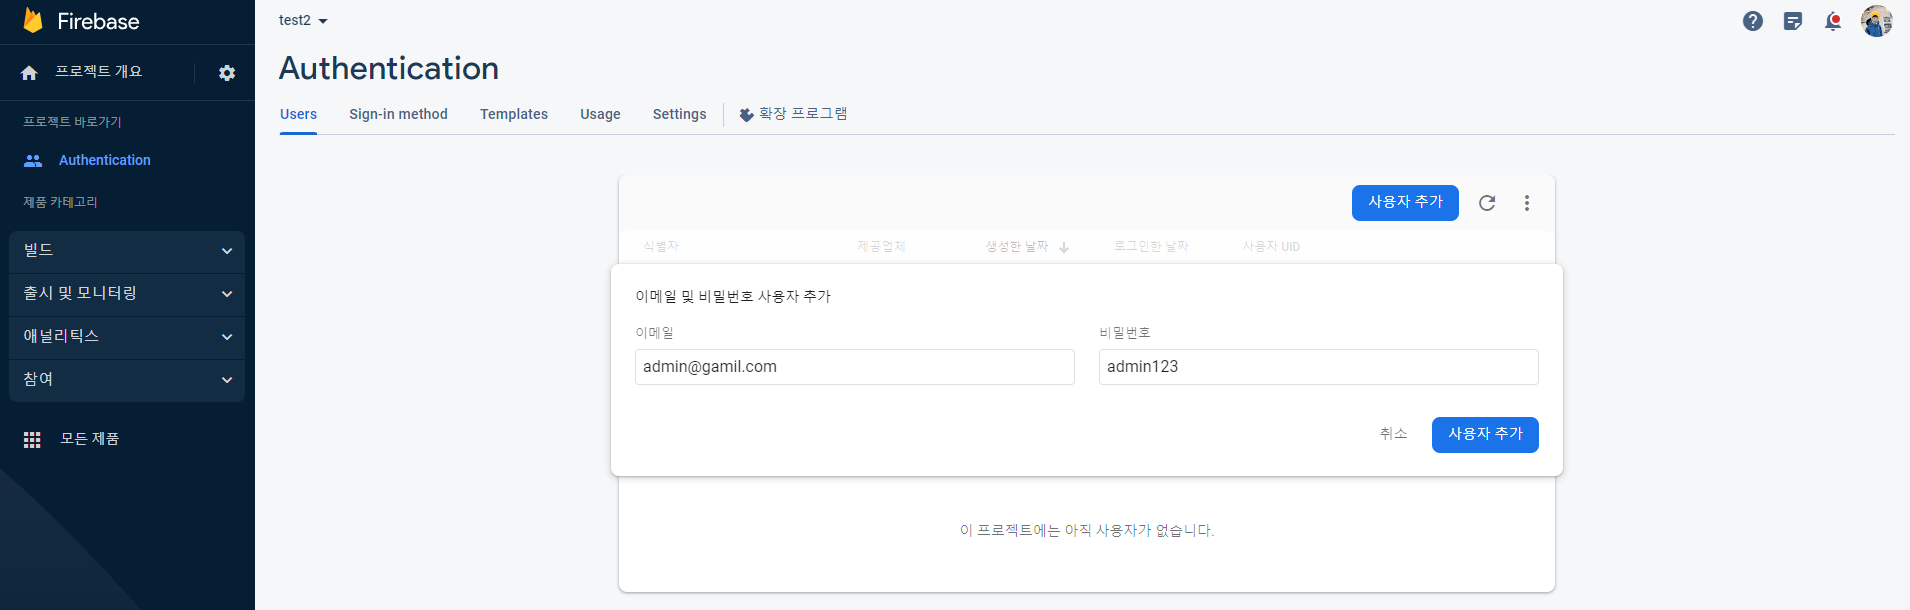
⑨ 원하는 이메일과 비밀번호를 입력해 주도록 합니다.
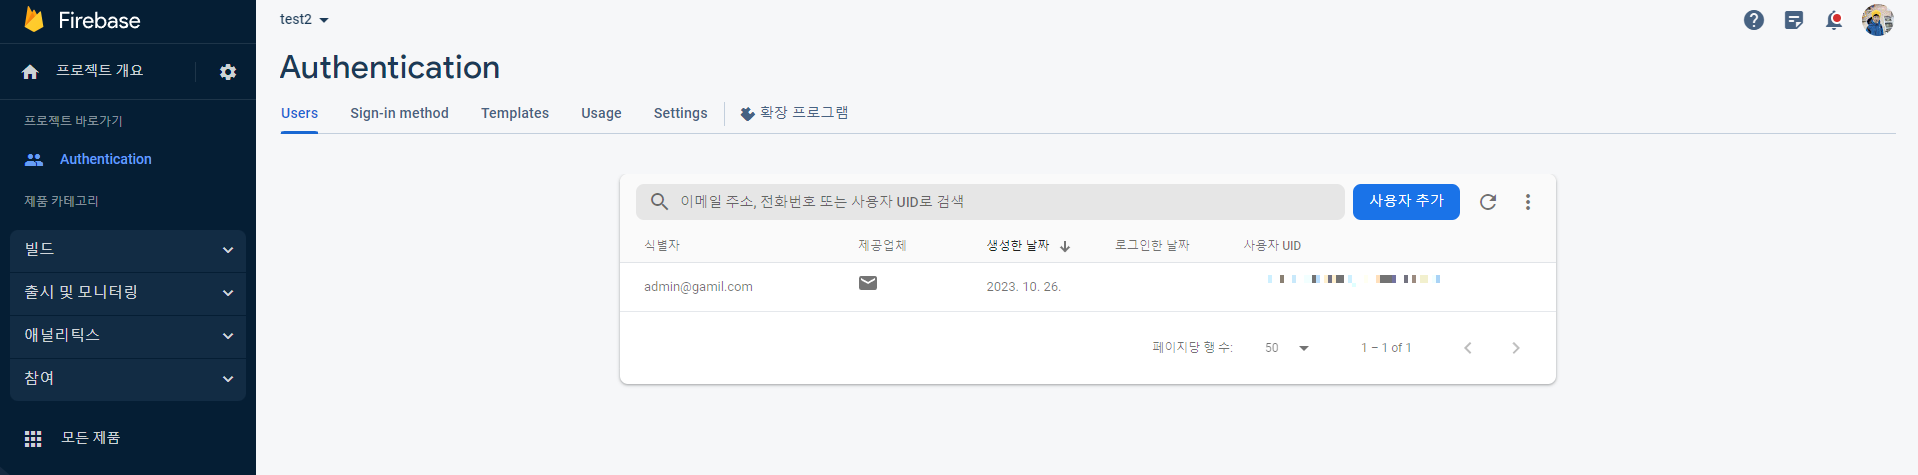
⑩ 이메일과 비밀번호가 입력된 결과를 확인 하실 수 있습니다.
Part 3. 로그인 코드 작성
- 로그인, 로그아웃에 대해 전체 코드를 넣어 놨으니 복사해서 붙여넣으시면 됩니다.
import {
    KeyboardAvoidingView,
    StyleSheet,
    Text,
    TextInput,
    TouchableOpacity,
    View,
} from "react-native";
import { signInWithEmailAndPassword } from "firebase/auth";
import React, { useState, useEffect } from "react";
import { auth } from "../firebase";

const Loginscreen = () => {
    const [email, setEmail] = useState("");
    const [password, setPassword] = useState("");
    const [user, setUser] = useState("");

    const onHandleLogin = () => {
        if (email !== "" && password !== "") {
            signInWithEmailAndPassword(auth, email, password)
                .then((e) => console.log("Login success", e.user.email))
                .catch((err) => Alert.alert("Login error", err.message));
        }
    };

    const clearInputs = () => {
        setEmail("");
        setPassword("");
    };

    const handleLogout = () => {
        auth.signOut();
    };

    const authListener = () => {
        auth.onAuthStateChanged((user) => {
            if (user) {
                console.log("user", user);
                clearInputs();
                setUser(user);
            } else {
                setUser("");
            }
        });
    };

    useEffect(() => {
        authListener();
    }, []);

    return (
        <KeyboardAvoidingView style={styles.container} behavior="padding">
            {/* Login Input Box */}
            <View>
                <TextInput
                    style={styles.input}
                    placeholder="Enter email"
                    autoCapitalize="none"
                    keyboardType="email-address"
                    textContentType="emailAddress"
                    autoFocus={true}
                    value={email}
                    onChangeText={(text) => setEmail(text)}
                />
                <TextInput
                    style={styles.input}
                    placeholder="Enter password"
                    autoCapitalize="none"
                    autoCorrect={false}
                    secureTextEntry={true}
                    textContentType="password"
                    value={password}
                    onChangeText={(text) => setPassword(text)}
                />
            </View>

            {/* Login Button */}
            <View style={styles.btnContainer}>
                <TouchableOpacity style={styles.btn} onPress={onHandleLogin}>
                    <Text style={styles.btntext}>Log In</Text>
                </TouchableOpacity>
            </View>

            <View style={styles.btnContainer}>
                <TouchableOpacity style={styles.btn} onPress={handleLogout}>
                    <Text style={styles.btntext}>Log Out</Text>
                </TouchableOpacity>
            </View>
            <Text style={{ margin: 20 }}>
                유저이메일 결과 확인: {user ? user.email : "로그인 아웃 중"}
            </Text>
        </KeyboardAvoidingView>
    );
};

export default Loginscreen;

const styles = StyleSheet.create({
    container: {
        flex: 1,
        alignItems: "center",
        justifyContent: "center",
        color: "black",
    },

    btnContainer: {
        width: "78%",
        justifyContent: "center",
        alignItems: "center",
        marginTop: 40,
    },

    btn: {
        backgroundColor: "#223a5e",
        width: "100%",
        padding: 15,
        borderRadius: 10,
        alignItems: "center",
    },
    input: {
        margin: 10,
    },

    btntext: {
        color: "#ffffff",
    },
});
Part. 4 결과 확인
- 아이디와 비밀번호를 입력하면 파이어베이스에 등록된 인증을 사용할 수 있습니다.
* 아래 동영상에는 비밀번호 입력이 보이지 않습니다.
수고하셨습니다.
반응형
'IT > REACT NATIVE(리액트 네이티브)' 카테고리의 다른 글
| [React Native] EXPO - Firebase 회원가입 (0) | 2023.10.26 |
|---|---|
| [ReactNative] RN - 리액트 네이티브 안보이는 앱 아이콘 보이게 하기 (0) | 2023.06.28 |
| [React Native] RN - 네이버 로그인하기(Android Naver Login) (0) | 2023.06.14 |
| [ReactNative] RN IOS - axios http 허용하기 (0) | 2022.10.18 |
| [ReactNative] RN Android - 바코드 스캔 (0) | 2022.10.17 |
'IT/REACT NATIVE(리액트 네이티브)' Related Articles
more

