
반응형
Notice
Recent Posts
Recent Comments
Link
| 일 | 월 | 화 | 수 | 목 | 금 | 토 |
|---|---|---|---|---|---|---|
| 1 | ||||||
| 2 | 3 | 4 | 5 | 6 | 7 | 8 |
| 9 | 10 | 11 | 12 | 13 | 14 | 15 |
| 16 | 17 | 18 | 19 | 20 | 21 | 22 |
| 23 | 24 | 25 | 26 | 27 | 28 |
Tags
- 나스
- 서울
- 장고
- Nas
- 수도권 근교
- SQL
- MSSQL
- synology
- 함수
- 맛집
- 강릉
- Excel
- apk
- Django
- 리액트
- 연곡해변
- 시놀로지나스
- ReactNaitve
- 캠핑장
- 리엑트
- docker
- 엑셀
- 시놀로지
- react native
- 캠핑
- 가상환경
- Expo
- reactnative
- Firebase
- react
Archives
- Today
- Total
차근차근 생활 & 코딩
[React Naitve] RN - WEBVIEW (웹뷰) 사용법 본문
반응형
안드로이드 편
Part 1. 웹뷰에서 React Native로 메세지 데이터 보내기
Step 1. 설치하기
웹뷰를 사용 할 수 있도록 아래 명령어를 통해 라이브러리를 설치해 주시면 됩니다.
npm i react-native-webview
Setp 2. 웹뷰에서 rn으로 데이터 송신(전체 코드)
import {View, Alert} from 'react-native';
import React, {useRef} from 'react';
import {WebView} from 'react-native-webview';

export default function App() {
  const html = `
    <script>
      function send(){
        window.ReactNativeWebView.postMessage('결과 값 출력');
      }
    </script>
    <button style="width: 400px; height: 400px; font-size: 50px" onclick="send()">Send</button>
  `;

  const webviewRef = useRef();

  /** 웹뷰 ref */
  const handleSetRef = _ref => {
    webviewRef.current = _ref;
  };

  //웹뷰에서 rn으로 값을 보낼때 함수
  const handleOnMessage = e => {
    // postMessage 담겨있는 결과 값이 웹뷰에서 값을 출력
    console.log('콘솔', e.nativeEvent.data);
    Alert.alert(e.nativeEvent.data);
  };

  return (
    <View style={{flex: 1}}>
      <WebView onMessage={handleOnMessage} source={{html}} ref={handleSetRef} />
    </View>
  );
}
onMessage
: 웹뷰에서 보내는 데이터를 받습니다.
source
: 웹 사이트 경로 입니다.
useRef
: .current 프로퍼티로 전달된 인자(initialValue)로 초기화된 변경 가능한 ref 객체를 반환합니다.
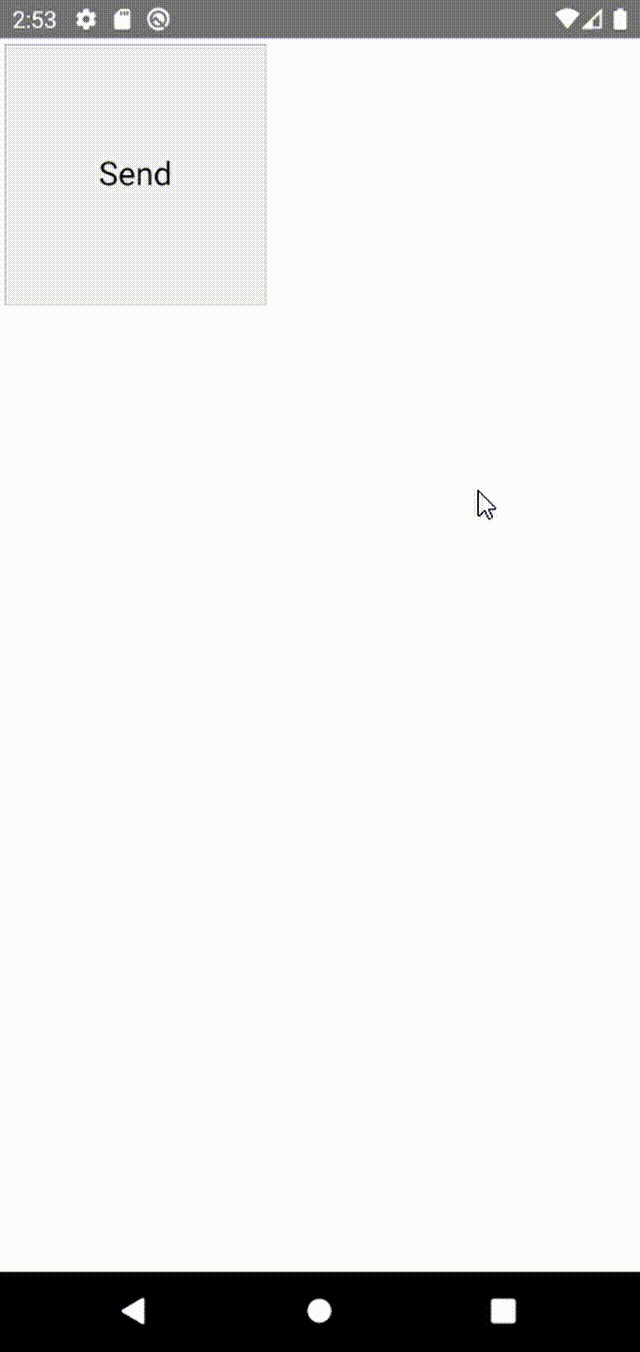
Step 3. 코드 실행 결과
Part 2. React Native에서 웹뷰로 메세지 데이터 보내기
전체 코드
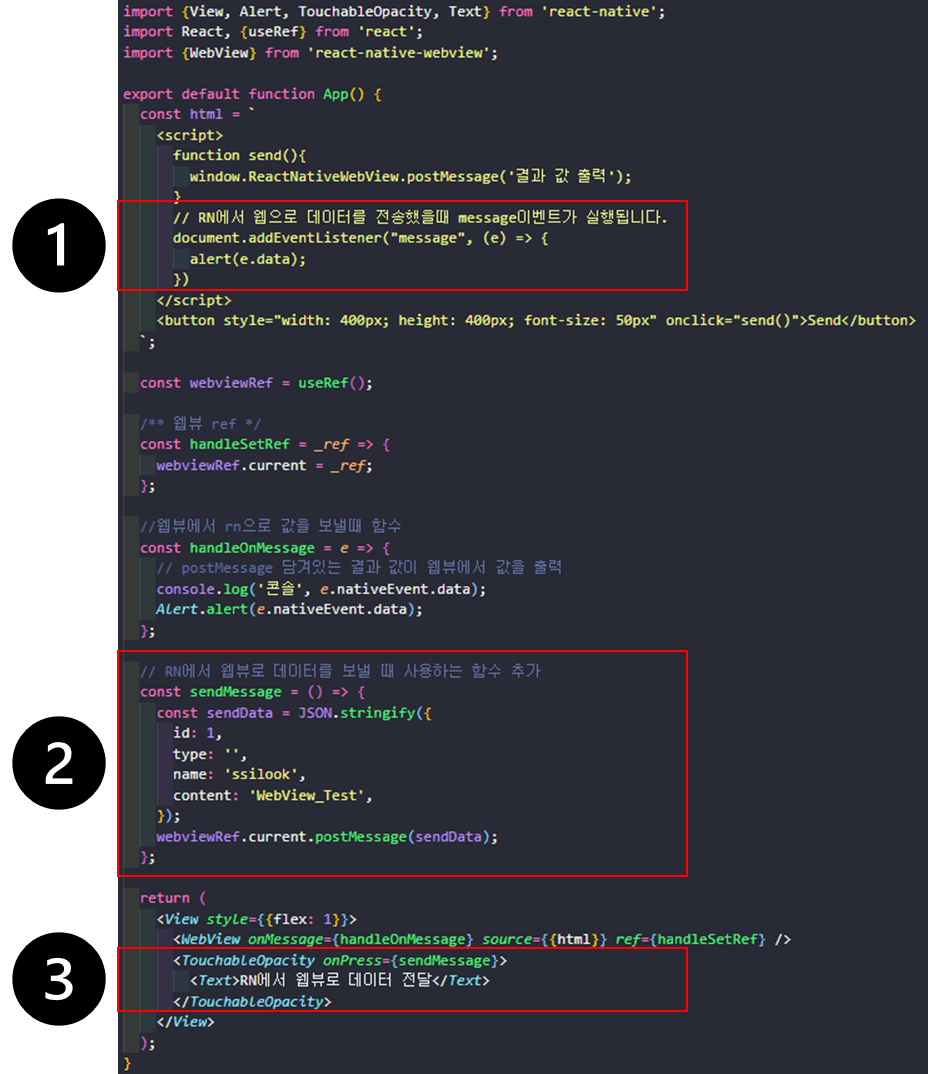
import {View, Alert, TouchableOpacity, Text} from 'react-native';
import React, {useRef} from 'react';
import {WebView} from 'react-native-webview';

export default function App() {
  const html = `
    <script>
      function send(){
        window.ReactNativeWebView.postMessage('결과 값 출력');
      }
      // RN에서 웹으로 데이터를 전송했을때 message이벤트가 실행됩니다.
      document.addEventListener("message", (e) => {
        alert(e.data);
      })
    </script>
    <button style="width: 400px; height: 400px; font-size: 50px" onclick="send()">Send</button>
  `;

  const webviewRef = useRef();

  /** 웹뷰 ref */
  const handleSetRef = _ref => {
    webviewRef.current = _ref;
  };

  //웹뷰에서 rn으로 값을 보낼때 함수
  const handleOnMessage = e => {
    // postMessage 담겨있는 결과 값이 웹뷰에서 값을 출력
    console.log('콘솔', e.nativeEvent.data);
    Alert.alert(e.nativeEvent.data);
  };

  // RN에서 웹뷰로 데이터를 보낼 때 사용하는 함수 추가
  const sendMessage = () => {
    const sendData = JSON.stringify({
      id: 1,
      type: '',
      name: 'ssilook',
      content: 'WebView_Test',
    });
    webviewRef.current.postMessage(sendData);
  };

  return (
    <View style={{flex: 1}}>
      <WebView onMessage={handleOnMessage} source={{html}} ref={handleSetRef} />
      <TouchableOpacity onPress={sendMessage}>
        <Text>RN에서 웹뷰로 데이터 전달</Text>
      </TouchableOpacity>
    </View>
  );
}
코드 실행 결과
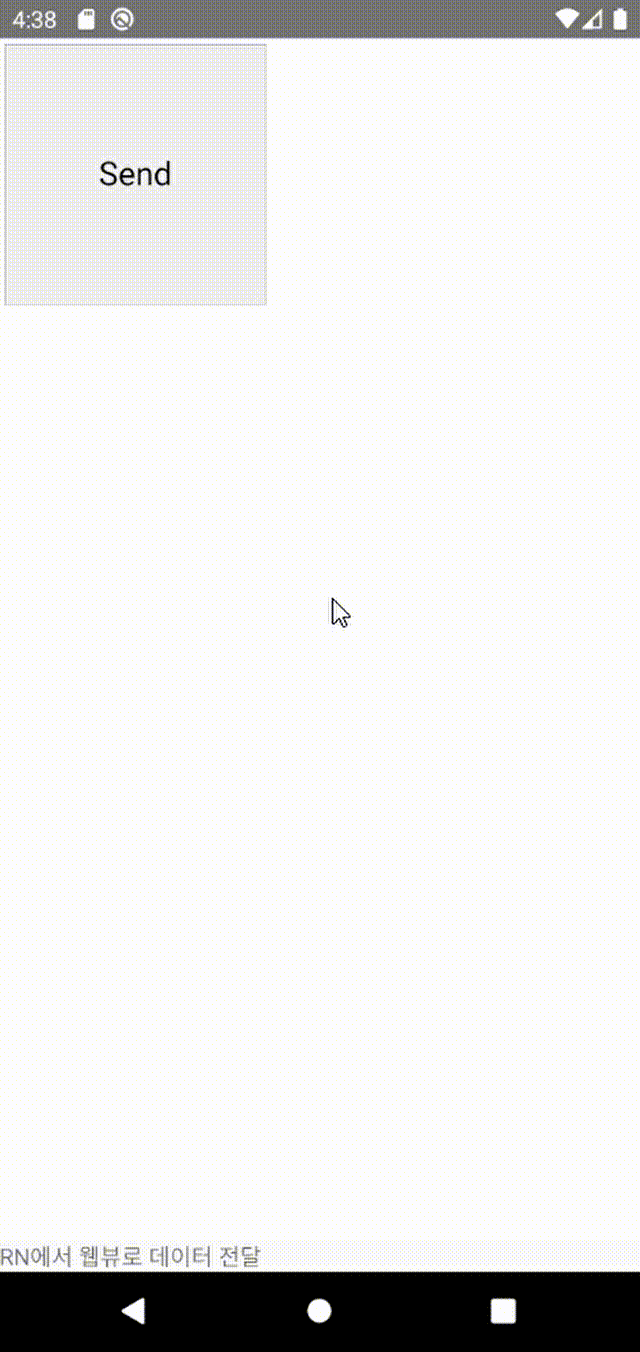
코드를 잘 불러오는 것을 확인 할 수 있습니다.
코드는 전체 코드를 붙여넣으신 후 테스트 하시면 됩니다.
수고하셨습니다.
반응형
'IT > REACT NATIVE(리액트 네이티브)' 카테고리의 다른 글
| [RN] React Native - 키 해시(Key Hash) 얻는 방법 (0) | 2022.06.15 |
|---|---|
| [RN] React Native - 앱 아이콘 이름 변경 (0) | 2022.06.06 |
| [React Native] RN - 권한(카메라, 사진, 미디어, 파일, 위치) 요청하기 (0) | 2022.03.23 |
| [React Native] RN - 환경 변수를 활용한 API key 숨기기 (0) | 2022.03.18 |
| [React Naitve] RN - Firebase 구글 로그인(Google Login) 구현하기 (0) | 2022.03.17 |
'IT/REACT NATIVE(리액트 네이티브)' Related Articles
more


Comments